


Sixfab Arduino NB-IoT shield is a Narrow-Band IoT(LTE CAT-NB1) shield for Arduino, based on Quectel’s BC95 module. NB-IoT is a Low Power Wide Area(LPWA) technology that is the latest cellular network option for low power connected projects.
This shield has been designed with built-in temperature, humidity, light sensors, 3-axis accelerometer, relay, micro sim card slot and a built-in antenna. If there is a need for long-range, better signal quality, a U.FL antenna receptacle is placed, can be selected over RF Switch by the short-headers easily.
The shield comes with USB-TTL converter, 4 M-M jumper cable and a jumper connector. Use of each element will be explained later.

Getting Started
NB-IoT technology has been designed for low power consumption and wide range application. Few mentionable applications are : Smart Parking, Smart City, Water Management, Environment Monitoring and many more. Since it has been designed to consume minimum energy it doesn’t support TCP protocol but UDP protocol is supported. We can use UDP protocol over both local and remote server. Local server refers to your own machine while remote server is another machine/computer.
For this tutorial we will be observing how to set configurations for localhost and sending data over localhost UDP.
1. Login to you routers configurations, by going to 192.168.1.1(generally this is the address for router configurations, might change for some router) from your Internet browser and login with your own credentials.

2. Now scroll down at Basic Status page to find your IP address of your connection (which is mentioned as dsl_internet in our case). We will need it later.
 3. Now click on Forwarding form the option list and then click Virtual Server.

4. Then click on Add New, which will take you to the following screen. Now fill up Service Port(as desired, in our case it is 5000), IP Address(It is IP Address of your Computer/Laptop. Check the note below if you don’t know how to obtain your IP Address) and select Protocol(as UDP). Click Save.

## Note: Open your terminal and run ifconfig command to obtain your IP Address. This is applicable for linux users. Windows user can type ipconfig in cmd command.
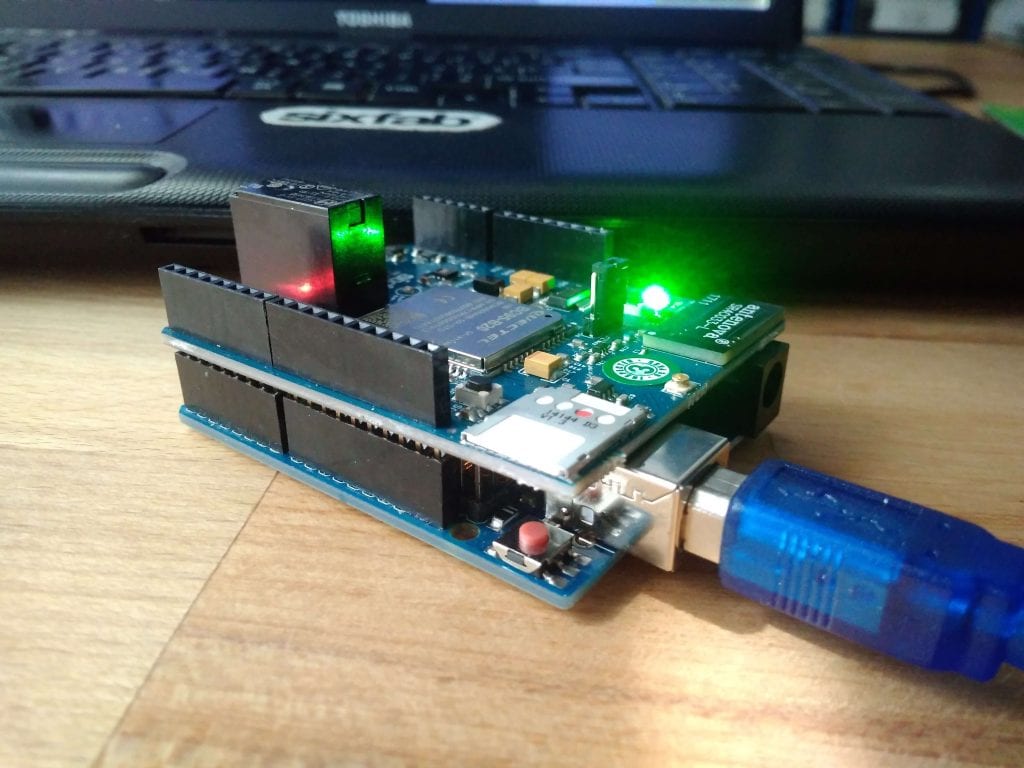
5. Now take your Sixfab Arduino NB-IoT shield and insert SIM card. Before you start coding we would like to mention some details about the shield. There is a built-in PCB Antenna and you are also allowed to use external antenna. Depending on your desired option, you will need to connect a jumper as shown in the figure below. Here we have connected the jumper connector for the built-in PCB Antenna.


6. Plug the shield over your Arduino board. Then connect your Arduino to your computer.

7. Now download the sketch gettingStartedNBIoT.ino and upload it to your arduino.
8. Here we are going to use USB-TTL converter that came with the shield. The reason why we are doing so is, the UART of the Arduino is already being used by BC95 module. So we will need another serial connection in order to observe our readings. Moreover to observe the data via our second serial we will need another serial monitor. We are going to use Serial Port Terminal in linux.(Windows user can use HERCULES SETUP).
The USB-TTL has 4 wires among them
VCC(5V, Red cable),
TX(Green cable),
RX(White cable) and
GND(Black Black).
There are also 4 M-M Jumper Cables so that you may connect to your shield.
The connection is to be made as following:
USB-TTL ↔ Sixfab Arduino NB-IoTShield
5V ↔ NOT USED
GND ↔ GND
TX ↔ D10
RX ↔ D11
#Note: Power has been supplied from USB so we don’t have to connect VCC of the USB-TTL converter. This is to be noted that your Arduino is connected with a good quality USB cable, otherwise you may face problem in making connection to server due to lack of sufficient power.
9. Now open Serial Port Terminal and go to Configuration > Port.

10. Select your Port where your USB-TTL is connected(it’s ttyUSB0 in our case) and set Baud Rate to 9600.Then click OK.

Then you will be able to see following screen.
 11. Now to listen data being sending over UDP port, open a terminal and run the following command
netcat -ul -p5000
where 5000 is our port number, so make sure you change it with your own port number. Windows user can HERCULES SETUP for this step.
Then you can observe the data that has been sent over UDP.

Hence you are able to listen the data that are being sent over UDP. The process can be carried out with remote server too.
Congratulations you are made your Sixfab Arduino NB-IoT shield work. In next tutorial we will be looking at accessing one of the built-in sensors on the Shield.