


Visual information transmission has become of great importance with the increasing digitalization of the world. We encounter digital signage in stores, cafes, hospitals, offices and many places in the city. Thanks to digital signage, announcements prepared as visual or video can be easily projected on screens. The global digital signage market is valued at USD 26.45 billion in 2024 and is projected to reach USD 52.37 billion by 2034, with a compound annual growth rate (CAGR) of 7.9%.[1]
In this blog you will learn how to use Raspberry Pi and piSignage to create a cost-effective and flexible digital signage network. You will also discover how the ALPON X4 device developed by Sixfab provides convenience and many advantages in this system.
Why Choose Raspberry Pi for Digital Signage?
Raspberry Pi is very popular in the IoT world because it is a single board computer that is widely used for prototyping and deployment due to its versatility, support for communication protocols and various sensors. Thanks to its open source software support, many makers around the world are using Raspberry Pi to build DIY digital signage networks.
Raspberry Pi is widely used in the IoT world as a cost-effective platform for prototyping and deployment of smart home automation, environmental monitoring, and industrial IoT solutions due to its versatility and support for various sensors and communication protocols.
With a Raspberry Pi signage player, you can synchronously display media content on different screens and update it remotely via an internet connection. There are also many Raspberry Pi digital signage software options. One of the most preferred of these is piSignage.
What is piSignage and How Does It Work?
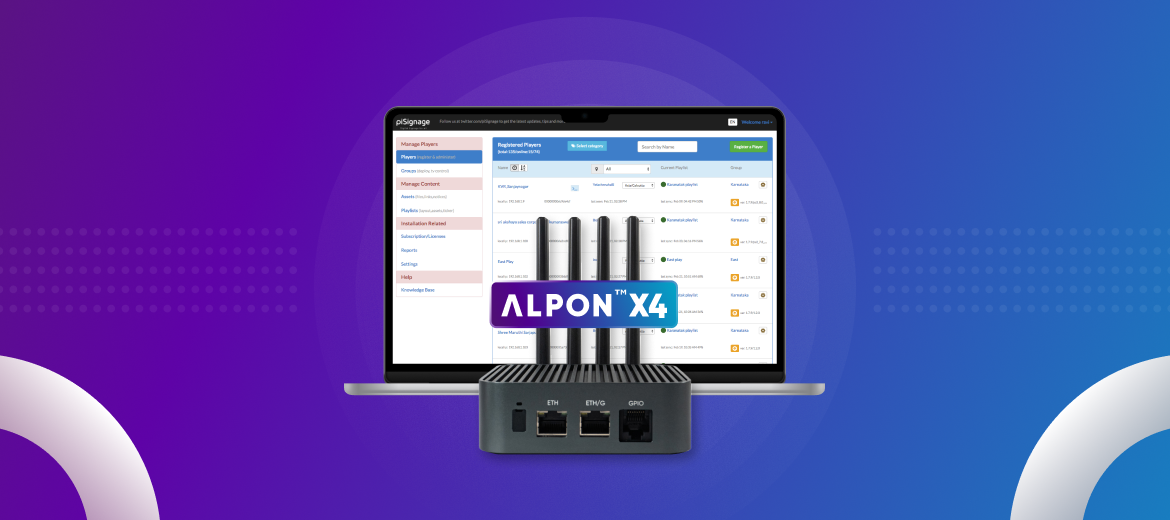
piSignage is a digital signage software developed especially for IoT devices such as Raspberry Pi. It allows you to send content to the screens via web, i.e. cloud-based management. You can control your content at any time and manage multiple screens at the same time. piSignage works in harmony with ALPON X4 powered by Raspberry Pi CM 4 and plays your videos, images and HTML content.
The features of piSignage:
- Cloud dashboard with multi-device control
- Offline playback support
- Scheduled content rotation
- Custom layouts and HTML overlays
- Easy setup on Raspberry Pi and ALPON X4
Simplifying the digital signage setup process, this software is ideal for both small businesses and large organizations. It also offers a detailed piSignage installation guide for users. If you have different needs, you can also search for piSignage alternative solutions on the market.
ALPON X4: The Perfect Companion for piSignage
Sixfab’s ALPON X4 is an edge computer powered by Raspberry Pi Compute Module 4, designed for industrial IoT and digital signage projects that can operate in many environments.
ALPON X4 features:
- Powerful Processor: Fast response with quad-core Cortex-A72.
- Connectivity Flexibility: Ethernet, Wi-Fi, LTE and eSIM support.
- Remote Management: Remote device update and monitoring with ALPON Cloud.
- Durable Design: Silent, fan, aluminum casing withstands harsh conditions.
- Advanced Security: Provides encrypted communication and data security with TPM 2.0.
These features ensure high performance and seamless connectivity for Raspberry Pi display solutions. ALPON X4 is one of the best options for digital signage solutions. For more information about ALPON X4, please visit the product page.
Step-by-Step Guide to Setting Up Your Digital Signage Network
You can follow the steps below to set up your own digital signage network. Instead of Raspberry Pi, ALPON X4, which is already powered by Raspberry Pi, is used.
Step 1: Gather Your Hardware
The basic components you need to get started are:
- ALPON X4 (includes Raspberry Pi Compute Module 4)
- HDMI cable and a display (TV or monitor)
- Micro SD card (at least 16GB)
- Power adapter and internet connection via LTE, Ethernet, or Wi-Fi
ALPON X4 offers a reliable connection even in remote locations with LTE and eSIM support,
Step 2: Prepare your ALPON X4
Make sure you have an active and ready device in ALPON Cloud. If you have an ALPON X4 and have not set it up, visit the ALPON X4 Getting Started page to complete the setup quickly and easily.
Step 3: Deploy Your Signage
After preparing your ALPON X4, follow the Digital Signage Deployment with PiSignage tutorial to deploy the PiSignage image on ALPON Cloud. How to configure both server and player, how to build docker images are explained in detail in this tutorial.
Step 4: Configure Your Digital Signage Network
You can use piSignage’s web-based interface for digital signage network management. After deployment, you can access the PiSignage dashboard from a device on the same network with ALPON X4 via port 3000 and 8000 of ALPON X4’s IP. Here you can create a playlist, upload your media files or group your screens. ALPON X4’s automatic network switching feature keeps your system running even during internet outages.
Step 5: Test Your Signage
Test your system and make sure everything is working correctly. Make sure playlists are playing properly, screens are synchronized. If you have problems, the Sixfab support team will help you quickly. You can easily scale your system by adding more screens.
Benefits of Using piSignage with Raspberry Pi
The combination of piSignage and ALPON X4 is ideal for those looking for a cost-effective digital signage solution. It is among the best choices for small businesses that care about scalable, fast installation and management costs. It also offers customization thanks to its open-source nature. By using open-source digital signage software, you can both reduce costs and design a system that suits your needs.
Real-World Applications of Raspberry Pi Digital Signage
Projects prepared with Raspberry Pi digital signage software can be used in many areas of life:
- Retail Promotions: Sync campaign visuals across branches in real time
- Restaurant Menus: Update prices or highlight daily offers with one click
- Corporate Dashboards: Display KPIs, metrics, and internal communications
- Education: Share campus news, emergency info, or timetables
- Healthcare: Queue systems, patient guidance, or awareness campaigns
With digital signage network management, you can centrally control these contents and make instant updates.
Tips for Optimizing Your Digital Signage Performance
Here are some suggestions to make your digital signage work more effectively and smoothly:
- Update the content frequently, avoid repeating the same thing on the screens. Use attractive and concise messages or images.
- Make sure the connections are robust. Take precautions.
- Update devices regularly.
- Make sure the network is stable. Ensure uninterrupted internet connection by using ALPON X4’s automatic network switching feature.
- If you are building an advanced structure, you can customize it using open-source digital signage software tools.
Why Sixfab is Your Go-To for Digital Signage Solutions
Sixfab offers solutions for digital signage projects with its new IIoT products powered by Raspberry Pi such as ALPON X4. It stands out for its hardware and software quality, fast technical support and user-oriented features. The robustness and scalability of ALPON X4 for Raspberry Pi display solutions makes a difference in almost any industry. Sixfab’s community support and documentation will help you step by step as you implement your projects.
If you want to create digital signage with Raspberry Pi, piSignage and ALPON X4 offer cost-effective, secure, scalable, secure network connectivity, long-term operation and easy maintenance for your digital signage projects.
Get started now and get your message out to the world!
Resources
[1] http://expertmarketresearch.com/reports/digital-signage-market